Calendar Module
Introduction
The Event Calendar allows you to quickly add a calendar to your website. Subsequently, whenever you add an event to the calendar using the Event Calendar, it will automatically update your website with the listing.Visual Tutorials
Getting Started
Start the Calendar tool by clicking on the Calendar icon, which looks like this:
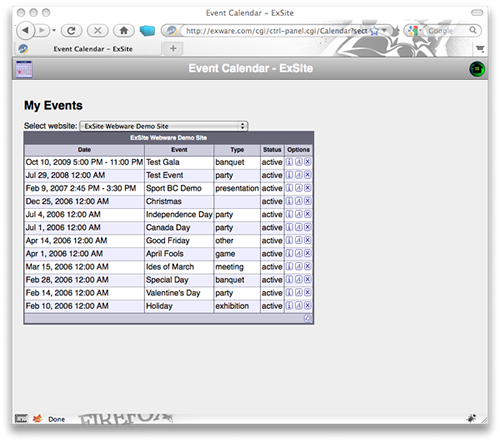
First you must choose which website you are working with, using the drop-down selector.
Event Selection

Once you have selected a website, a list of all of the events in that site appears on the left side. You will find three small icons next to each event listed. These are:
| Click on this icon to view the event listing. | |
| Click on this icon to edit the event listing. | |
| Click on this event to deleted the event listing. |
New Event
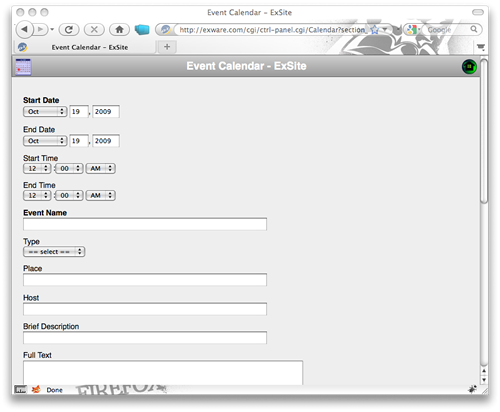
To create a new event, select the New Event icon (![]() ) at the bottom of
the list of events. The New Event screen looks like this:
) at the bottom of
the list of events. The New Event screen looks like this: 
Start filling in the pertinent information:
- Start Date
The start date of the event - End Date
The end date of the event. Use the same date as the Start Date if one day event - Start Time
Time the event begins. - End Time
Time the event ends. - Event Name
Name of the event ie: MS Ride - Type
Select the type of event it is ie: banquet, conference, concert etc... - Place
Location of the event - Host
Host of the event - Brief Description
Provide a one-line description of the event. This will be used in certain Calendar views on the website. - Full Text
Provide the complete details and description of the event. - Brochure
Here you have the option of attaching a PDF brochure of the event. - Image
Here you have the option of attaching a image relating to the event ie: logo, venue photo etc... - More Info URL
You have the option of including a URL link to the event website (if applicable) - Register URL
You have the option of including a URL link to a separate registration website (if applicable) - Access
Set the event to be Public or Member Only