Template Tutorial
This article is a step-by-step introduction to creating web page templates in ExSite.
We are going to use the following example page to illustrate the procedure:
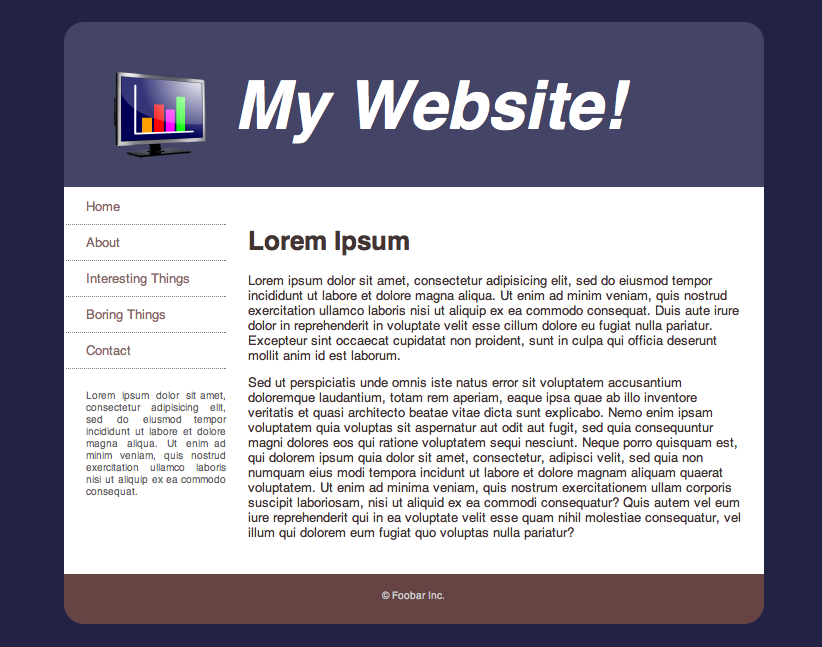
This is a simple example, with a header, footer, 2-column layout, and some auxiliary files (an image and a stylesheet). More complex designs will have much more going on, but the basic principles are the same.
Here is the raw HTML for the above web page:
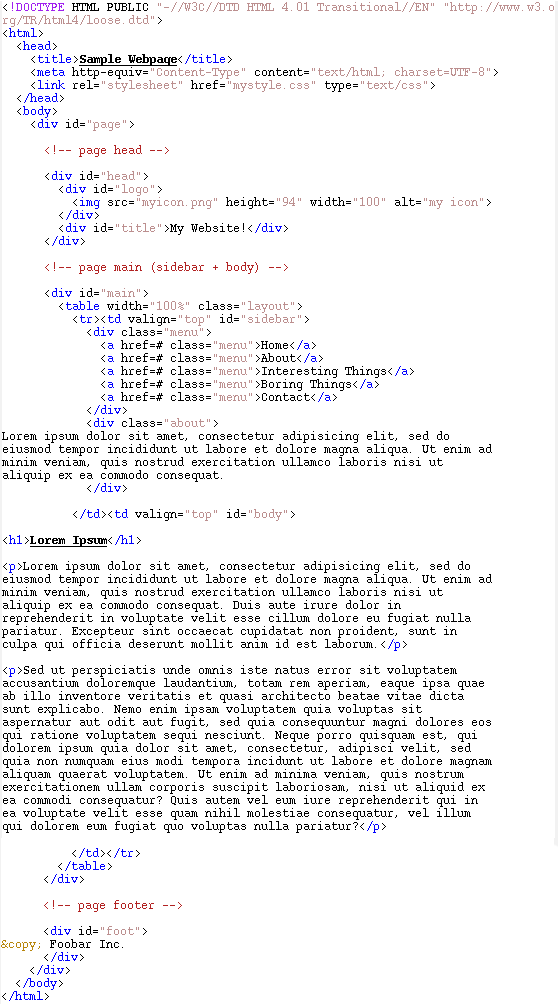
Some points to take note of:
We change the file references to CMS references using the double-bracket notation:
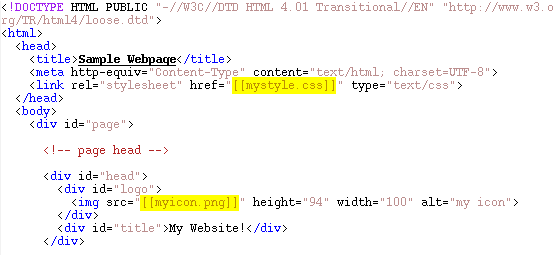
The Import Template function in the Website Manager will perform this step automatically—it imports the basic HTML for your page, updates all file references as above, and then prompts you to upload each of those files.
Replacing these with metadata tags is straight-forward:
Note that in our example, the page title is used only in the HTML title element, which is not visible in the page content itself. But we are using the website title in the page content (the large white text in the head section). In practice, you can put metadata tags anywhere, even inside attributes of other tags, eg:
The content blocks in our example are highlighted here:
Each of these is replaced with a content tag of the form:
Note that each content block gets its own unique name. Inside the template you can define each of these blocks of content to provide it with some default content that will be used if the page does not otherwise specify what should go there. For example, it would be a good idea to define a default footer and a default about block. It is probably not necessary to define a default body since pages usually have their own unique body content.
Although you probably want a body so that you can change it from page to page, there is no need to separate out other content blocks from the template. For example, we could leave the about and footer sections in our example untouched. Then that content would be inseperable from the template itself. However, separating them out gives us more options for changing that content in specific cases.
Here is the navigation menu in our example:
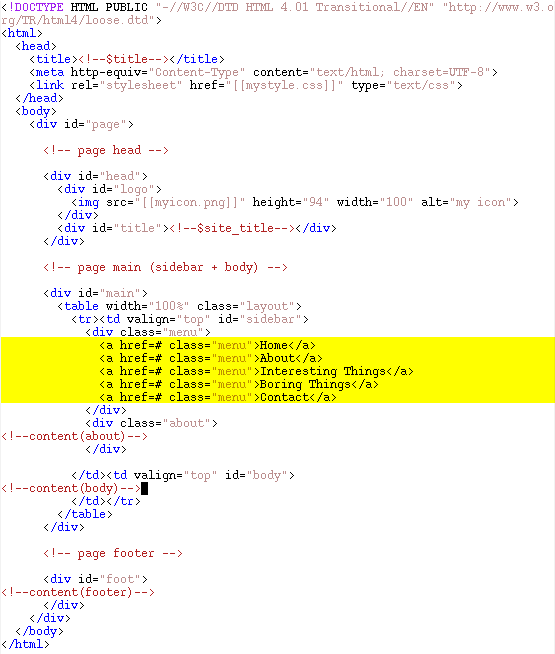
We can replace this with a plug-in tag for our menuing plug-in. In this case, we will use the SimpleMenu plug-in, and ask it to generate a vertically-oriented menu:
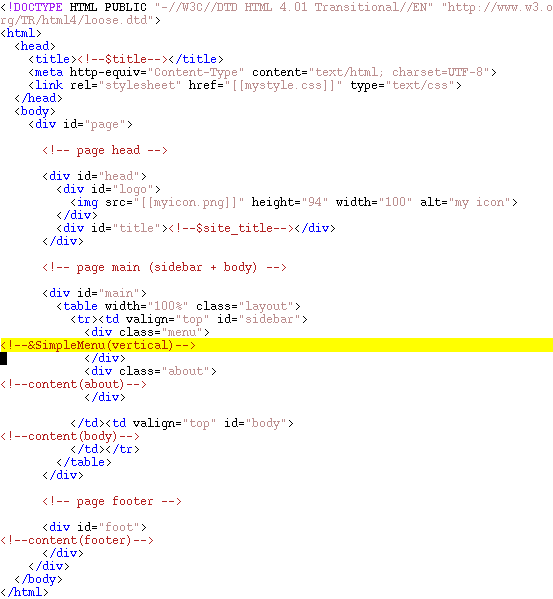
SimpleMenu adds some markup to the menu links to format it correctly for simple cases, but since we have already formatted and styled our menu links, we do not want to use the default SimpleMenu markup. By default SimpleMenu adds a text string between each menu item. Our menu layout does not require anything between our menu items, so we should specify a string that effectively does nothing, for example:
Alternatively you can specify some menu markup that is for this template only. To do this, create the following content objects in your template:
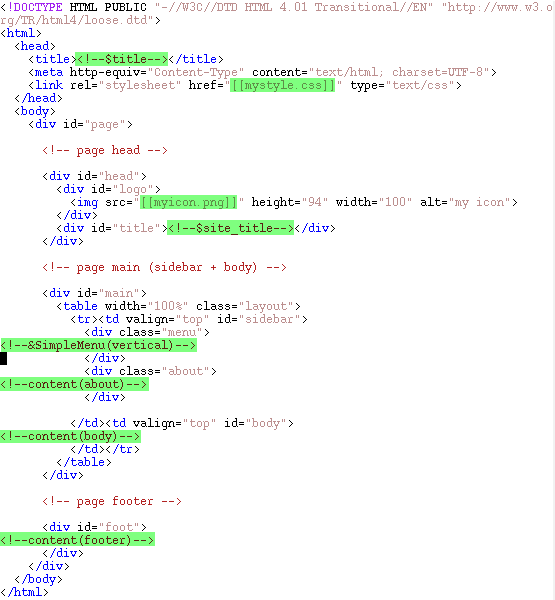
This HTML is stored inside the template, in a content object called page, because it defines the complete page layout.
If viewed inside the Website Manager tool, the template should contain the following component content objects:
1. Create an HTML version of your web page design
You can create your mock-up using any web design tools you like, such as Dreamweaver, or a even just a plain text editor. If you have an existing website, you can simply save a representative page to your computer as a complete web page (with files). However you produce it, you will need a stand-alone HTML file (along with auxiliary media such as images and stylesheets) in order to begin.We are going to use the following example page to illustrate the procedure:

This is a simple example, with a header, footer, 2-column layout, and some auxiliary files (an image and a stylesheet). More complex designs will have much more going on, but the basic principles are the same.
Here is the raw HTML for the above web page:

Some points to take note of:
- This page declares itself as HTML 4.01 transitional, but you can
declare any HTML standard you like, or none at all (quirks mode).
- This page uses a mix of CSS and table-based layout. You can use either method, or a mix of both; ExSite does not care.
2. Mark-up references to secondary files
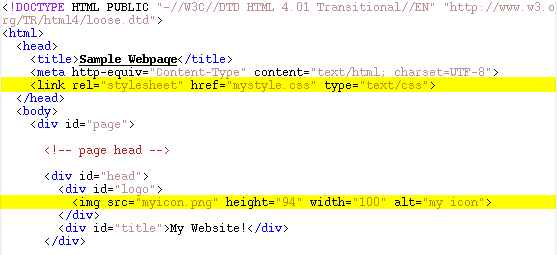
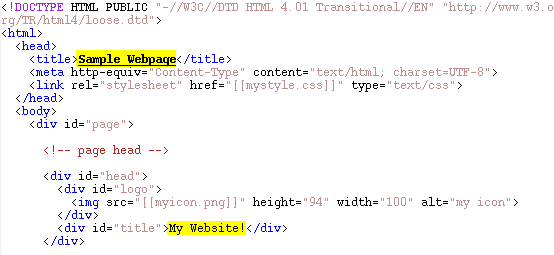
Your webpage may make use of images, stylesheets, and scripts that are in separate files. Your mock-up will be pointing to a literal file on your disk, but you need to change these so that they point to an object in the CMS. This is easily done using the double-bracket notation for files. The original file makes reference to external media in these locations:
We change the file references to CMS references using the double-bracket notation:

The Import Template function in the Website Manager will perform this step automatically—it imports the basic HTML for your page, updates all file references as above, and then prompts you to upload each of those files.
3. Add Metadata variables
Metadata variables can be inserted anywhere in your HTML using the notation:<!--$meta-->Where 'meta' is a piece of metadata, such as:
- title (page title)
- site_title (website name)
- description (page description)
- site_description (website description)
- keywords
- filename
- label (menu title/description)

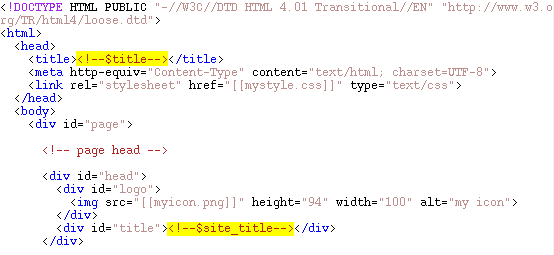
Replacing these with metadata tags is straight-forward:

Note that in our example, the page title is used only in the HTML title element, which is not visible in the page content itself. But we are using the website title in the page content (the large white text in the head section). In practice, you can put metadata tags anywhere, even inside attributes of other tags, eg:
<meta name="keywords" content="<!--$keywords-->">
4. Designate your content blocks
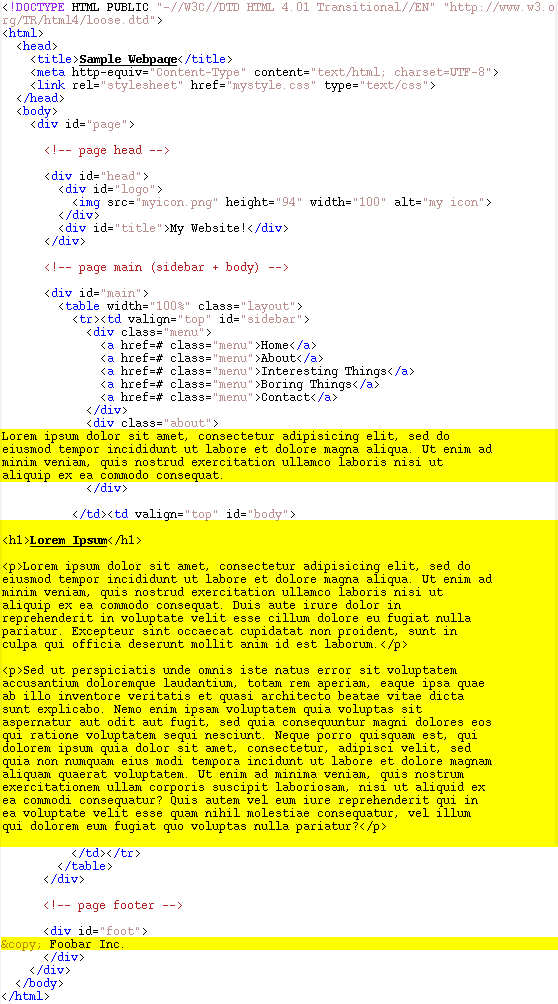
Your content blocks are the sections of the page that contain content that you may want to change from page to page. Typically, each page will have a 'body' content block that contains the main (primary) content for that page, and a number of other secondary content blocks that may or may not be specific to that page.The content blocks in our example are highlighted here:

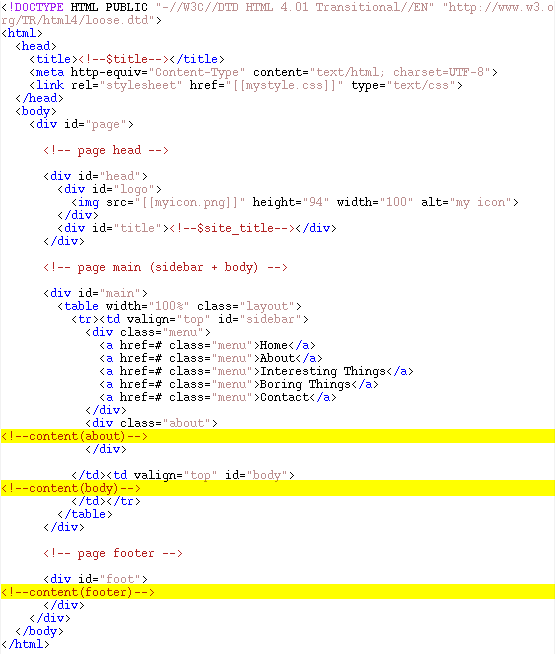
Each of these is replaced with a content tag of the form:
<!--content(name)-->

Note that each content block gets its own unique name. Inside the template you can define each of these blocks of content to provide it with some default content that will be used if the page does not otherwise specify what should go there. For example, it would be a good idea to define a default footer and a default about block. It is probably not necessary to define a default body since pages usually have their own unique body content.
Although you probably want a body so that you can change it from page to page, there is no need to separate out other content blocks from the template. For example, we could leave the about and footer sections in our example untouched. Then that content would be inseperable from the template itself. However, separating them out gives us more options for changing that content in specific cases.
5. Menus
You can leave your menus hardcoded in your template, but then you have to update your template whenever your site navigation changes. If you want your navigation menus to update automatically, you should replace your menus with a menuing plug-in that will generate your navigation links for you.Here is the navigation menu in our example:

We can replace this with a plug-in tag for our menuing plug-in. In this case, we will use the SimpleMenu plug-in, and ask it to generate a vertically-oriented menu:

SimpleMenu adds some markup to the menu links to format it correctly for simple cases, but since we have already formatted and styled our menu links, we do not want to use the default SimpleMenu markup. By default SimpleMenu adds a text string between each menu item. Our menu layout does not require anything between our menu items, so we should specify a string that effectively does nothing, for example:
vmenu_spacer = <!--menu spacer-->Place this setting into your SimpleMenu.conf configuration file. This setting will be used for all websites on your system.
Alternatively you can specify some menu markup that is for this template only. To do this, create the following content objects in your template:
- SimpleMenuTop - this HTML will be placed at the beginning of the menu
- SimpleMenuBot - this HTML will be placed at the end of the menu
- SimpleMenuMid - this HTML will be placed between each menu link
6. Final Template
Here is what our final template looks like, with our changes highlighted in green:
This HTML is stored inside the template, in a content object called page, because it defines the complete page layout.
If viewed inside the Website Manager tool, the template should contain the following component content objects:
- page - the final templated HTML, as shown above
- mystyle.css - our stylesheet
- myicon.png - our icon/logo
- about - default content for our "about" block in the sidebar
- footer - default content for our footer
- body - the main block of content on the page
- optionally: SimpleMenuTop, SimpleMenuMid, SimpleMenuBot (to provide additional formatting instructions for our menu layout)
- upload your HTML mock-up from step 1, above
- upload your secondary media files as in step 2, above
- the Website Manager will automatically set up the content objects for the page and secondary files. You can then edit the page HTML to perform steps 3, 4, and 5, as above.